LAST UPDATED: May 1st, 2015
Let me preface this article by saying that I am not a professional videographer. The information I’m going to share has been obtained first hand while filming hunts over the past 6 years. Like many things in life, I believe there’s no absolute “right” way to setup your gear for filming your hunt. Everyone seems to find the way that works best for them, and this is what works best for me.
Also, before I get any nasty emails please keep in mind for purposes of these photos I was about 18″ off the ground so I did not wear a safety harness. Anytime I’m hunting from an elevated position I always wear my Hunter Safety System and I strongly recommend that everyone else do the same.
Now with that said, let’s talk about filming! When it comes to filming hunting adventures, there’s two ways to go about it. Both of these methods require a significant amount of additional work than hunting alone, and each has it’s ups and downs.
The first method is to be your own cameraman and film yourself. The plus side of this type of filming is that you don’t need to find a buddy to follow you around with a camera, which can be difficult. The down side here is that not only is it a lot of work, but in many cases the quality can suffer a bit. But if you work hard enough at it, and maybe get a little lucky, a self-filmed hunt can actually turn out very well.
When filming your own hunts, the best overall quality is going to be obtained by using multiple cameras. This allows you to capture additional footage that you need to fill in some of the gaps of filming yourself while hunting. I personally prefer to use a small POV style camera mounted either to my bow or to the tree I’m hunting from, and a larger HD quality camera mounted to a camera arm.
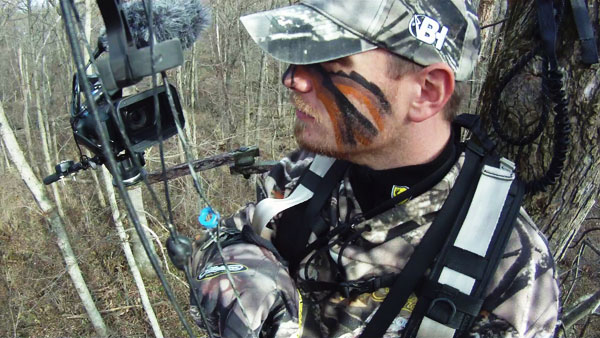
For the POV camera, my choice is the Epic Cam. This is a small HD camcorder with a very wide “fish eye” type of lens that captures nearly 180 degrees of action. Most of the time I mount this camera to my bow, facing back towards me to capture my actions while on the hunt. From getting ready at the truck and walking to my stand to pulling up my bow, glassing for deer, all the way to the shot and reaction this camera can capture it all. And with a variety of attachments such as suction cups, tree mounts, hat mounts and more you can put it just about anywhere.
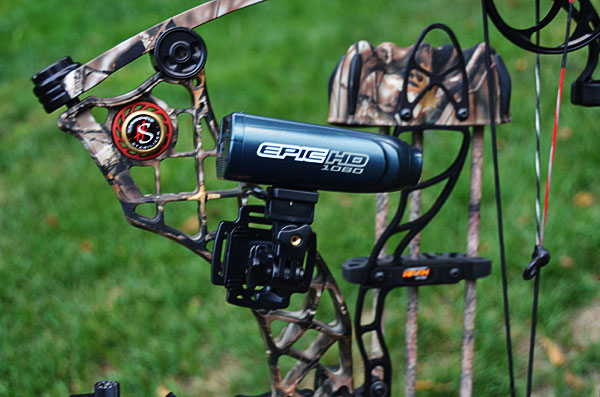
.
Here’s a shot from my Epic Cam captured during the 2011 hunting season.
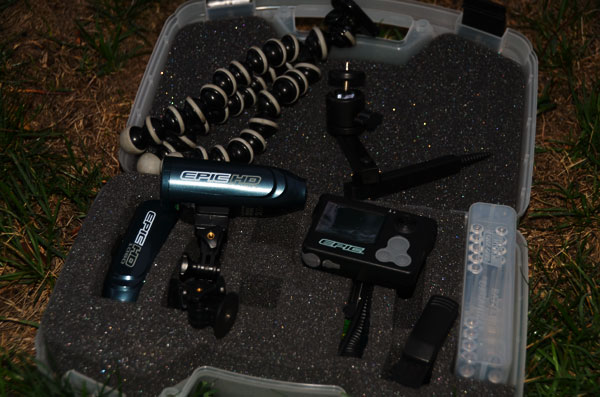
My POV arsenal includes two Epic action cameras, a tree mount, Gorillapod, several elbow mounts, a hat clip, external viewer and of course extra batteries.
The downfall of the POV camera is that it doesn’t capture much action at long distances. A lot of people like to mount them forward-facing on their bow which does work, but unfortunately you lose quite a bit of detail of anything past 10 or 15 yards. If you are on a very limited budget or don’t want to monkey around with cameras and camera arms than a small POV cam may be the best option for you.
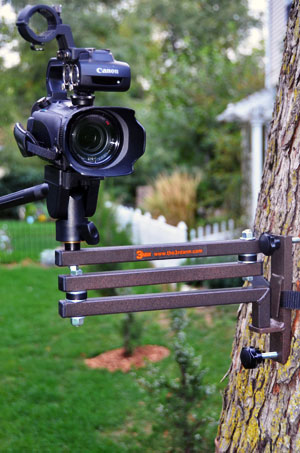
Once you get a camera you may want to pick up some accessories like microphones, lighting, lens filters and more. For purposes of this article I won’t get too much into those items. Instead, I’ll focus more on the camera arm. Of course if you hope to film your own hunt you’ll need both hands free for your bow, which means you’ll need an arm to hold your camera.
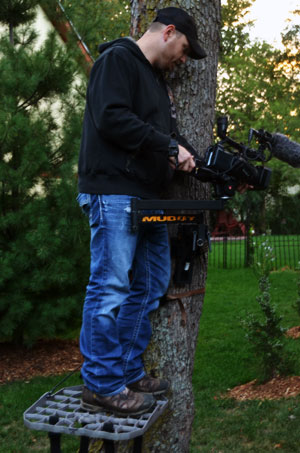
Again, size is key here. A small, compact arm that can be packed in and setup easily is the key. There are quite a few great options on the market from companies like Pine Ridge Archery, Lone Wolf, 3rd Arm, Muddy outdoors and more. In the pictures you see here I was using a 3rd Arm Bandit series, which was built specifically for smaller cameras. The base of the camera arm straps onto the tree and then the arm itself slides onto the base. This particular arm includes a very nice video head that works great for filming yourself.
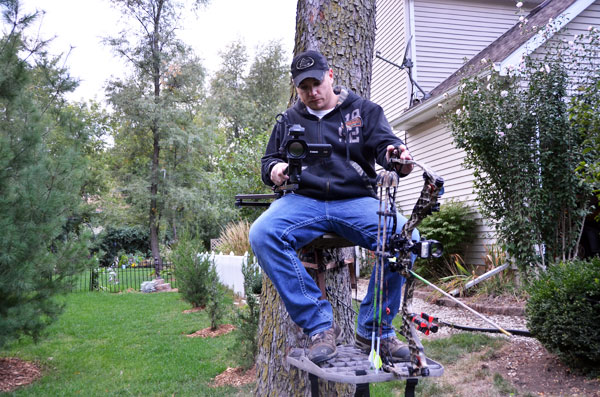
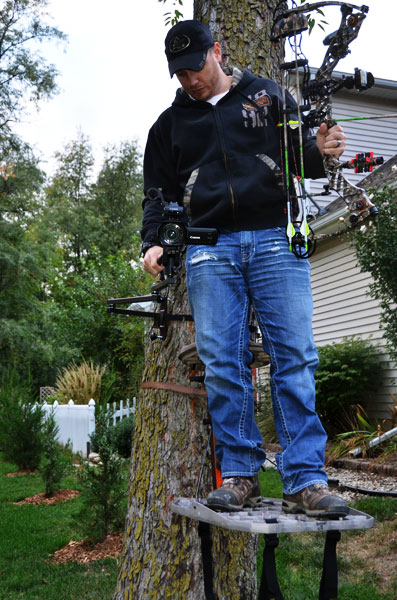
My personal preference is to setup the camera on my right side, just about waist high. This allows me to hold my bow in my left hand and operate the camera with my right prior to the shot. By having the camera at waist height this allows me to easily maneuver it while sitting down, which seems to happen quite a bit while self-filming. However, if I do need to stand up the camera can still be easily moved either by hand, or by pushing it side to side with my leg. This comes in handy when trying to line up that perfect shot.
Having the camera mounted just above seat level allows me to easily film and make adjustments while seated in my stand.
By simply adjusting the LCD screen I can still see what’s going on, and get the camera lined up before the shot.
For those who are interested in working with a cameraman, the same gear you use for self filming will work just fine. I know plenty of folks using the smaller cameras and arms to produce some really great footage. However, if you’re interested in going big, here’s how we do it.
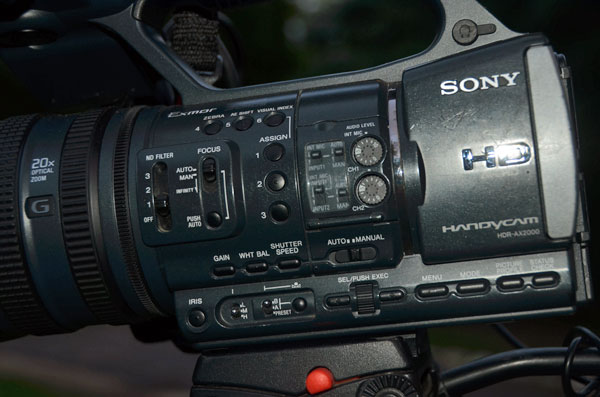
The current camera of choice for myself and several other Bowhunt or Die team members is the Sony AX2000. We like this camera a lot because it’s fairly easy to use, records direct to SD cards, has a 20x zoom, and is pretty darn good in low light. Sure, there’s a lot of other features we could talk about but those are the main ones we’re worried about. It is vital that you learn the functions of your camera before you hit the woods with it, so try and read the owner’s manual and familiarize yourself with the various controls and settings. One wrong audio setting or white balance setting can all but ruin your footage.
There’s a lot of stuff you should try and learn about your camera before heading into the field to make sure you get the best quality footage. Gain, white balance, shutter speed and audio levels can all make or break the quality of your footage.
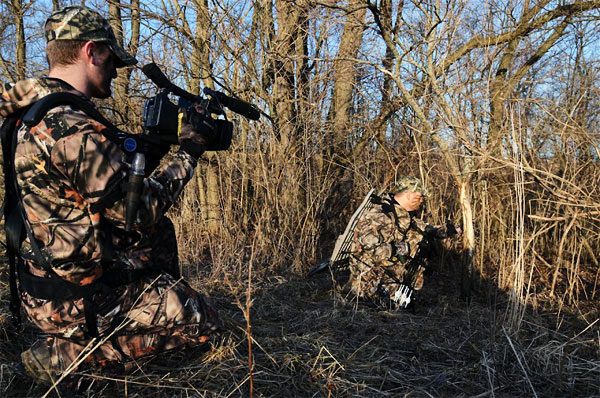
Now when I’m filming for someone else, the biggest difference is that I put the camera arm on the left side of my stand instead of the right. This is because of the fact that our camera stands are typically placed above and to the right of the hunter. Having the camera arm between the hunter and camera man allows us to get good interviews and capture that “over the shoulder” action.
When filming a hunt for another hunter I prefer to set the camera arm on my left side in order to capture the “over the shoulder” action. Just be sure not to setup too close to the hunter, as the camera gear may interfere with the shot. (You don’t what to know how I know that)
In order to support a bigger camera, you’ll need a bigger camera arm. My current arm choice is the Muddy Hunter. This arm is plenty big to support the weight of the camera and mics, and possibly the cameraman taking a nap on it from time to time. It’s a bear to lug in and out of the woods, but provides the rock solid footage that we’re looking for. Todd Graf is using the 3rd Arm Adventure series, and I know he likes it a lot. Either way you go, both are great options.
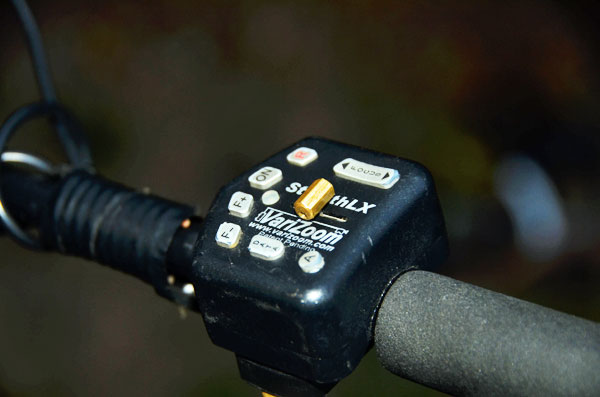
One great device that comes in handy while filming hunts off a camera arm is a remote LANC controller. This little device straps onto the handle of your pan/tilt head and allows you to control the focus, zoom and record functions of your camera without actually touching the camera itself. In my opinion this it the best accessory you can purchase for filming hunts, both for yourself or someone else. I would buy this before I bought a microphone or anything else.
This little gadget is extremely helpful when it comes to filming hunts, either self filming or with a cameraman.
The last piece of advice I want to give is to FILM EVERYTHING. From the time you wake up until the time you go to sleep, film as much as possible. The more footage you have and the more camera angles you have the better your finished product will be. Remember, there’s much more to your hunts than just sitting in a tree and shooting stuff. The excitement of getting ready to head out to your stand, a red sunrise on a frosty morning, and the chatter of nearby squirrels all add to the story that is our hunting season, so film as much of that as you can.
When it comes to filming hunts there’s a lot of trial and error that goes on, and the best way to find out what works for you is to just try different things. I know I missed a lot of info like packing the gear in and out, camera angles and accessories but this Blog has gotten too long as-is. Hopefully later this fall I’ll be able to give some additional advice on the gear that works best for me.
Good luck to those of you out there filming your hunts this fall! And make sure you keep up to date with our season at it happens by watching weekly episodes of Bowhunt or Die right here on Bowhunting.com.

 By
By 