LAST UPDATED: May 1st, 2015
The last time we discussed arrow shafts and all of the components that go into building an arrow. Now it is time to actually start putting the pieces together. Here we go!
Fletching Options
Before you start to glue your fletching to your arrow, you will need to determine what type of fletch orientation you are looking to achieve. Straight, helical, and offset are the main three ways to apply fletching. Straight fletch will give you the most speed and the least spin (stabilization) and is fletched in a straight line. Helical will stabilize the arrow more, due to more spin, but will do so at a slower speed and is fletched by curving the vane along the shaft in a slight bend. Offset is simply fletching a vane that is diagonal a few degrees on the shaft and will help stabilize the arrow at slightly slower speeds as well. Determining what method to use is a preference based on your intended outcome…fast flying arrow for increased KE and less arc, or an arrow that stabilizes better in flight at a slightly slower speed.
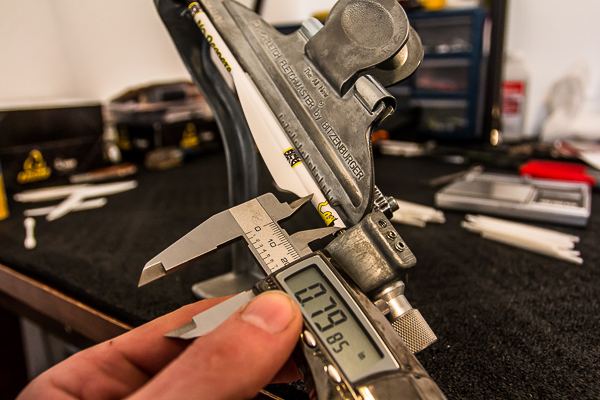
Precision equipment will ensure that your arrows are precisely made.
Fletching Process
Begin by taking a fletching and place it in a clamp and then take a digital caliper and measure the distance that you prefer from the end of the shaft to the fletching. This will allow you to place the fletching in the same location on each arrow. Next place the arrow in the fletching jig and rotate the arrow until you have the heavy side of the arrow that you marked earlier (from the bathtub test) on the top. This is where you will start the fletching process on each arrow.
Precision equipment will allow you to make precise arrows. This will only build confidence and increase overall shooting performance.
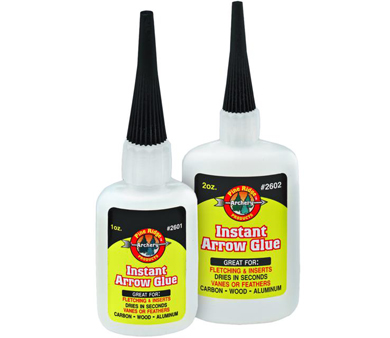
Take a q-tip and dip it in acetone and clean off the fletching from one side to the other. Then take a clean and dry q-tip and wipe down the same fletching. Let air dry for a moment and apply a very small line of glue down the fletching and then carefully place the fletching clamp onto the arrow. Figuring out how much glue to use will be a learning process. Normally less glue is better than having glue running down the side of the fletching. Wait the required amount of time for the glue you’re using to dry. Carefully remove the clamp and rotate the jig to the next position and repeat for your other fletching. Once finished with the fletching process, remove the arrow from the jig and place a small dot of glue on the front and back of each fletching to ensure it stays glued down. It is important to use a quality type glue to ensure proper adhesion. Pine Ridge Archery offers an instant glue (among dozens of archery products) that dries in seconds and is perfect for gluing inserts as well as plastic or feather vanes to wood, aluminum or carbon arrows.
Fletching Alternative
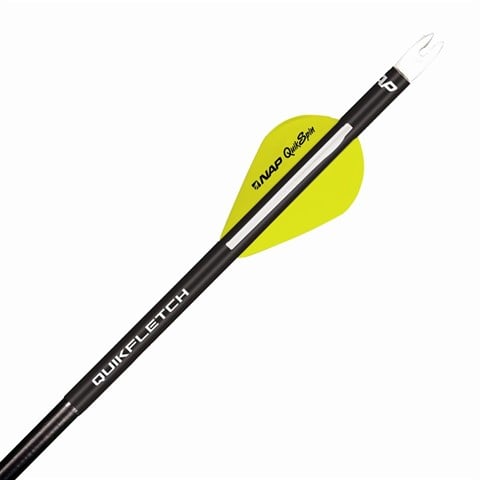
For those of you who are interested in an alternative to the standard fletching process you should check out the NAP Quikfletch. This system allows you to fletch a dozen arrows faster than it takes to boil a pot of water. In fact, that is the key to how the Quikfletch works.
NAP’s QuikFletch system shortens the entire fletching process down to mere seconds; ten to be exact. No glue, no jigs, no mess…nothing but pure accuracy.
Start by boiling a large pot of water. Then, slip the Quikfletch over your arrow shaft; indexing it in whatever manner you wish. Place the Quickfletch in the boiling water for 10 seconds and remove. That’s it! Your arrow is ready to shoot. The Quickfletch works by shrinking around your arrow and is guaranteed not to slip. These hi-performance fletches “turbo-boost your arrows giving you tighter groups and stable, straight driving arrow flight thanks to the patented Quik Spin vane. The Quik Spin vane is a revolutionary vane that optimizes spin, maximizes accuracy, and produces tighter arrow groups by rotating arrows up to 300% faster than conventional plastic vanes and over 100% faster than feathers. The result is increased accuracy, tighter groups and extended effective kill range.
Installing The Insert
Once the fletching procedure is complete, you can move on to gluing in the insert. Again, be sure to sort arrows from heaviest to lightest. Secure each insert into the shaft with epoxy. If you’re the type of person that prefers to have a broadhead aligned with the fletchings, then there are a few methods to achieve this. You can glue in the inserts, wait the required dry time and then shave off small amounts from the front of your arrow with an arrow squaring device so the broadhead will go deeper into the threads of the insert. Do this until the broadhead is aligned with the fletchings. Or you can screw a test broadhead into the insert and then push the broadhead-insert combination into the shaft and rotate the broadhead until it aligns with the fletchings. This second method would be the one to use if you have an insert that sticks out from the shaft or if you are shooting an outsert. Keep in mind, this will only work if you are using the same number of broadhead blades as fletchings, and will not work with two blade broadheads for obvious reasons.
You can build a better arrow by using the best materials. This includes everything from the arrow shaft itself to the glue used to attach the components. Pictured here is Pine Ridge Archery’s Instant Arrow Glue.
Finishing Touch
Have the epoxy cure for 24 hours with the arrows lying horizontally to ensure the inserts do not move in the shaft. If you are using an outsert or an insert that sticks out to the diameter of the shaft, you should stand your arrows upright. You will then re-weigh the arrows, and again sort them from heaviest to lightest. The final step would be to place the correctly weighted nock into each shaft and you should have a stack of arrows that weigh very close to the same weight and will be almost clones of one another. The last step would be to spin test the arrows to ensure they are square after everything has been glued. If the arrow wobbles, then something isn’t seated correctly and will cause the arrow to fly drastically off course when you test it at further distances. You can change things up on this arrow or simply use it for practice purposes only.
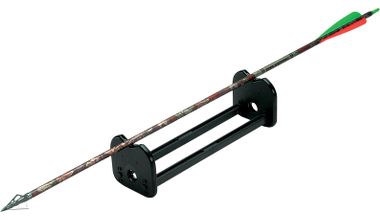
Pine Ridge Archery also makes the perfect tool to check your arrow building skills after the job is done. The Arrow Inspector is a simple device that will tell you whether or not your arrow is spinning true. After all, if your arrow doesn’t spin right it won’t fly right.
Conclusion
Building arrows by following these steps may seem like a time consuming procedure. But I believe the benefits outweigh the tedious methodology behind the long arrow assembling process. An arrow that is built with tight tolerances will almost resemble exact clones of the next arrow in your quiver, which will help keep your arrow flying true toward its intended point of impact no matter which one you reach for this fall.


