LAST UPDATED: May 1st, 2015
While most people love the idea of having better deer habitat and large elaborate food plots, it’s very easy to become overwhelmed with the amount of equipment and time it takes to do these types of projects. With that said, growing fall food plots can be a much less intimidating project than most people realize. My hope is that through this article I can share with you that producing a plot that can positively impact your hunting this fall doesn’t have to be super expensive or time consuming.
Fall Food Plot Seed Types
There are several types of seeds that are great options for fall food plot planting. Ideally you want a fast growing seed so that it’s productive for your upcoming hunting season. My greatest success with fall planting has been with brassica seed types. While I’ve planted many types of brassica, the deer herds I’ve been around have really liked our turnip plots best. The great thing about brassicas and turnips is that they produce a LOT of food per acre, arguably more than any other type of seed.
The other nice thing about brassicas and turnips is that, unlike soybeans or oats, you don’t have to fight the deer off to keep them out of it before season starts. Before you get a few hard frosts brassicas are fairly bitter to the taste and deer tend to avoid them. After a few good hard frosts though, the plants begin to make sugars to protect themselves from freezing. This sweetens the taste of the plant and that’s when deer begin to start eating them. In my experience in the Northeast, most deer will start to eat the tops off your brassicas in the 2nd-3rd week of October which is perfect timing for bow season.
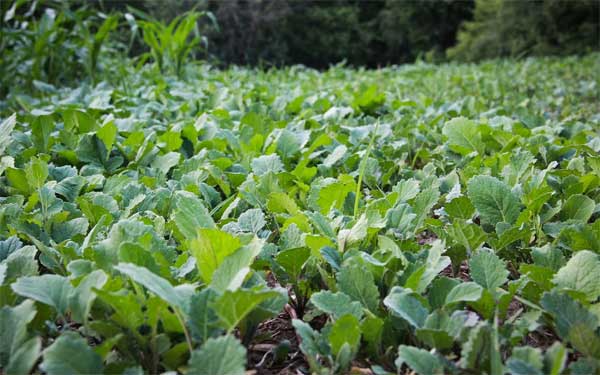
The green leafy foilage of a brassica food plot is unmistakable. While these food plots may not attract deer on opening day the only get better as the season goes on. Heartland Wildlife Buck Buster Brassicas shown above.
If you have a good sized plot of a ½ acre or more, deer can work on those tops until they are gone which can last a one to two months. Once the tops of your brassicas are gone, if hard winter has not set in yet, deer will often change food sources and temporarily abandon your foot plot. However they will almost always transition back to your plot once hard winter hits so they can dig up and eat the actual turnip bulbs in the ground. I’ve seen entire acre sized food plots completely scratched up and uncovered in the middle of winter in deep snow because deer will be foraging daily on these turnip bulbs.
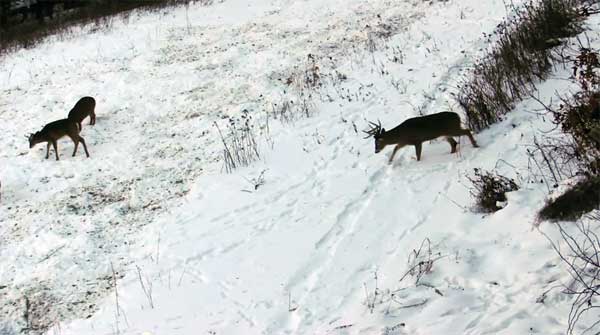
Other good options for fall food plot plantings are typically clover, chicory, or winter peas. While these won’t produce as much food per acre as a brassica plot and the deer will begin to eat it immediately after it sprouts, planting in the fall for the upcoming season is always beneficial. Clover and chicory are also perennials, so they will come back year after year if you provide minimal maintenance such as mowing and fertilizer. You have less competing invasive seed types in the air during the fall and the clover or chicory will almost always be much healthier when compared to a spring planting.
Spraying Pre-Existing Vegetation
The first thing you want to do when starting a plot is spray to kill existing vegetation with some type of glyphosate. Glyphosate is a generic type of broad spectrum herbicide that is used to kill broad leaf weeds and grasses. Your local farm supply or landscaping supply store will usually sell generic types of glyphosate in bulk for a significant savings over the brand name stuff that most have heard of.
When applying your glyphosate it’s important to know that you are working with a substance that is most effective when applied to the green surface area on plants. It does not work by being absorbed by roots, so it’s important if you mow before spraying to let things start to green up again before applying. The best thing is to actually spray your ground cover at full height as there will be lots of surface area for the glyphosate to attack. This also leaves dead organic matter on the surface of the seed bed to help hold in moisture after you plant your seed. Think about how when many people plant new grass seed in a lawn, they then spread hay or straw around after seeding to help hold moisture in. The dead ground cover you previously sprayed can do the same thing when you seed a plot. This can be important especially if you are going to drill or no-till your food plot.
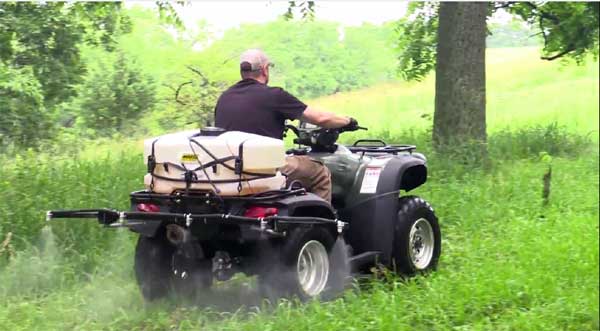
While it’s easy to spend a lot of money on high end sprayers, you can do the task with some pretty cost effective equipment. If you have an ATV you can find reasonably priced sprayers for a few hundred dollars like the ones found on www.mooseutilities.com. If you don’t have access to an ATV you can do it the old fashioned way with a $20-$30 hand pump sprayer that has a few gallons capacity. I’ve personally done many plots in excess of an acre with the hand pump variety for years and while it takes more time and you have to be careful in paying attention to what’s been sprayed for even coverage, they absolutely will work.
Preparing Your Seed Bed
Once you have sprayed and killed off existing vegetation, now it’s time to prepare your seed bed. Let’s talk about the three main methods people use to spread their intended seed.
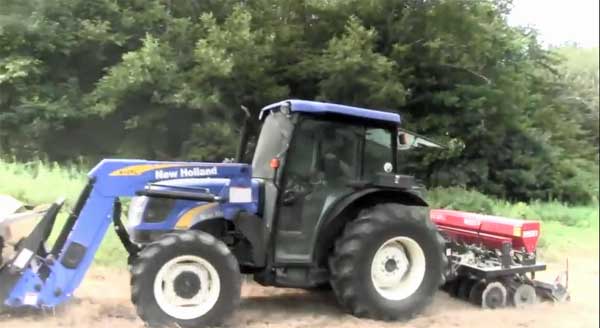
If you have access to a tractor many people will prefer to use a seed drill. These tend to be fairly expensive pieces of equipment, but often times can be rented from local farm equipment rental businesses. Benefits of drilling seed are that you don’t have to turn ground with a disc or plow. This will help allow the ground to retain its natural moisture. If you have already sprayed, there will be a natural covering over the seed as well to protect it while it’s germinating. It will also prevent invasive seed types (think weeds) from taking hold as there will be ground cover and the intended plot seed will be under everything. Drilling will also require that you use less seed per acre as you will have a much higher germination rate. Drilling seed will typically show the most benefit when planting larger seed types such as corn, beans, or peas.
Using a tractor with a no-till drill is a great way to seed your food plots. However don’t get discouraged if you don’t have this type of equipment at your disposal. A little hard wok and some sweat equity can do the job just as well.
Many of us (me included) don’t have access to a tractor or a seed drill. The next best option is to disc the ground to uncover fresh earth and a seed bed to then broadcast seed into. The best seed types to do this with are smaller seed types such as brassicas, clover, and chicory. The drawbacks to this are you can release a lot of moisture from the ground while discing. You also prepare a seed bed for any invasive seed that happens to be floating around in the air. Make sure if you choose the disc method that you don’t disc too deep. Most seed types such as brassicas only require being very slightly covered. Any more than ¼” coverage is too much so you don’t need to disc much deeper than 2-4”, you simply want to break up old root structure and expose fresh soil. The good news is that discing your ground up is one of the most cost effective means of creating a fall food plot though. If you have access to an ATV there are several very effective types of discs out there that vary from $400 to $1000 in cost that will turn over fresh soil and prepare a seed bed.
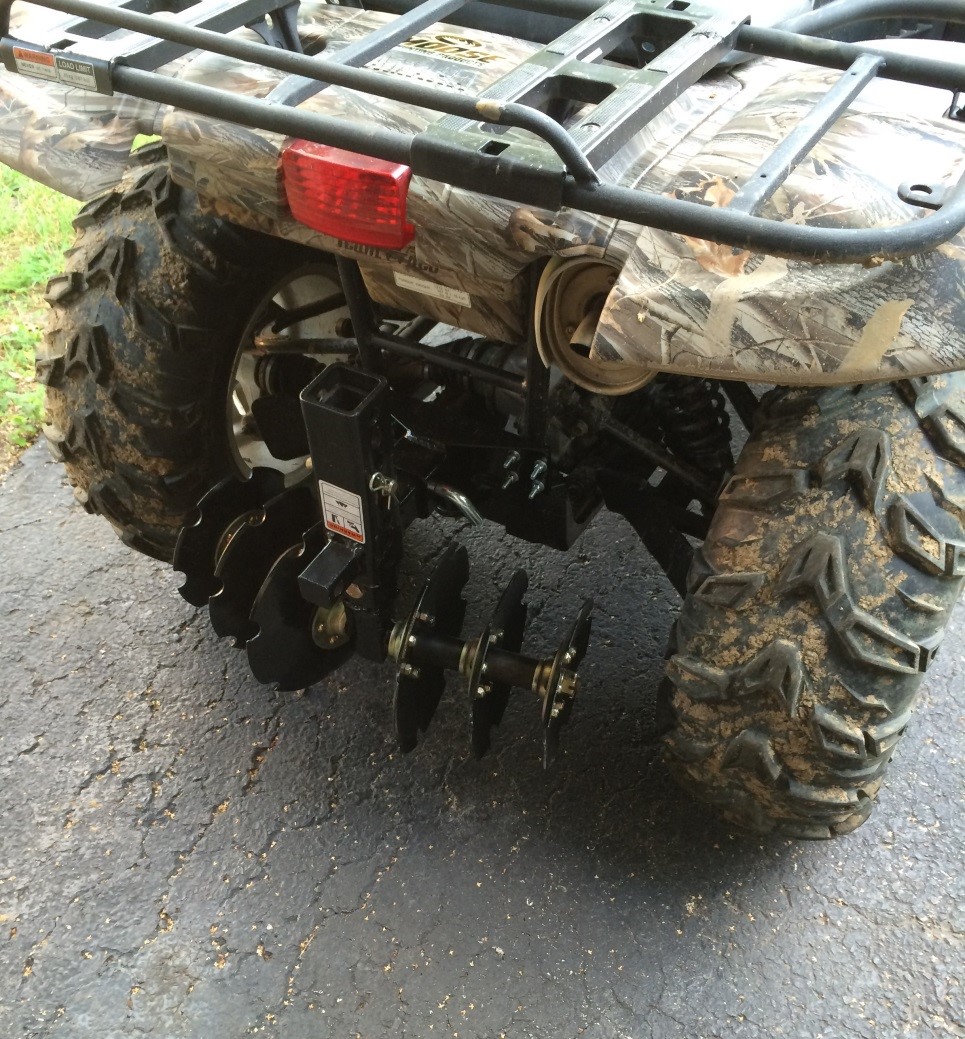
The GroundHog Max is a small, inexpensive, yet very effective disc for your ATV
The last method of seeding is what many refer to as “No-Till” seeding. Many seed types don’t require that the ground be disced or turned over to prepare a seed bed. After you have sprayed to kill off the previous growth and things die off, you can simply broadcast seed on top. The ideal situation would be to broadcast your seed when you know a good rain is going to follow almost immediately, the rain does an excellent job of lightly covering the seed. When considering no-till seeding it’s very important that you go with seed that is smaller in size. Larger grain type of seeds won’t typically have adequate soil coverage for consistent germination. Typically brassica and turnip type plots have done best in no-till type plots in my experience. Make sure if you are doing a no-till plot that you broadcast a bit more seed per acre than what’s recommended. You will not see the typical survival rate that you would when drilling or discing at the appropriate depth, so sometimes it’s a bit of extra insurance to put down more seed to compensate for this. When no-till seeding a plot it can also help to rake the seed bed before and after with a metal rake. While this may not prepare the bed as well as a disc it can help get enough soil to seed contact to germinate your food plot seeds.
There are many types of seed spreaders available today. Everything from the expensive seed drills, to ATV or tractor drawn broadcast spreaders, to hand crank spreaders. Over the years I’ve prepared many dozens of acres of food plots and only used a hand broadcast spreader. It takes a bit more work but is very effective and they only cost $25 or so.
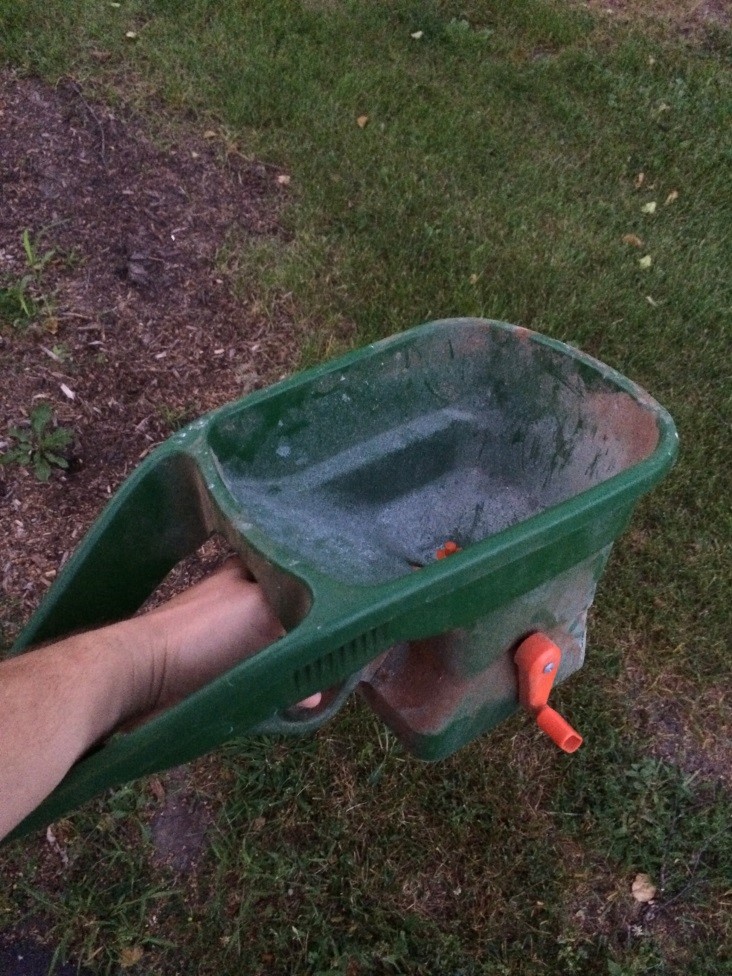
A small hand spreader can be very effective for spreading both seed and fertilizer in plots up to one acre in size
Covering Your Seed
One of the most common mistakes people make when first learning how to grow food plots is to cover the seed too deeply. It’s very important to read ideal planting depth on the bag of seed you are growing. What you will find with smaller seed types such as brassicas, chicory, and clover is that anything more than ¼” is too deep and they won’t germinate and break the ground. This is one of the reasons if you are disking the ground you don’t want to disc too deeply. Simply breaking up the root structure down to a few inches is plenty to prepare a great seed bed.
Once you have prepared the seed bed there are a couple of methods to cover the seed. If you are using a drill, the seed will already be at the ideal depth. If you are using a disc or no-till methods, you can either plan to spread the seed immediately before a good soaking rain, or you can use a drag of some type. I have a homemade drag I built out of a 4’ section of chain link fence that has worked great for me in the past. I think in total I had maybe $25 total in the setup. I simply zip tied a 4’ length of 4×4 lumber to the bottom of the chain link. On top of the chain link I had two 3’ pieces of light chain attached to the back of a lawn tractor with carabiners. After the seed was spread I would then drive around the plot making a single pass with this setup to lightly cover everything.
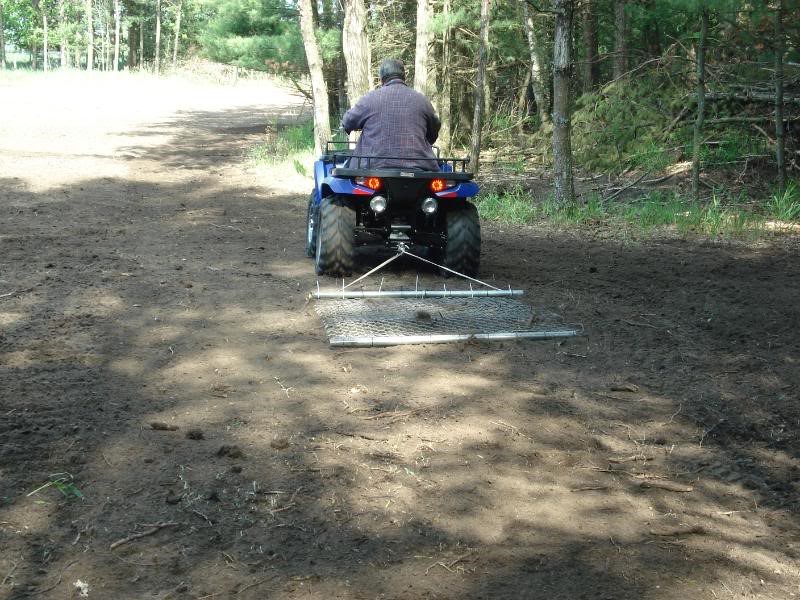
With $20-$30 and some ingenuity, you can build a small ATV drag for covering your seed.
PH Balance and Lime
In an ideal situation, I’d heavily recommend having your soil tested the spring before planting to get an idea of what type of lime and/or fertilizer you need. Fertilizer in particular can be expensive so it’s a great idea to know exactly what you need versus just guessing. Usually your local farm co-op can do this testing for you, and there are several food plot seed companies that can do the testing for you as well if you mail in samples.
For those of you that don’t have time to test, my recommendation is to try and target areas that don’t have tons of trees in immediate proximity. Typically if you do testing for PH levels, most of the time areas with a lot of foliage cover in close proximity will have much lower PH levels than areas that are mostly open field or previously farmed but overgrown field. Many times if you are planting on previously planted farm fields you won’t need to lime at all or nearly as much when compared to planting in secluded plots in the timber that are newly created. This year I have limited time to invest in my plots so I’m targeting previously cleared areas that aren’t completely covered in trees. If you have to plant in newly created clearings in the timber then I’d recommend starting your lime applications 6 months previous to your planting time. Apply at around 1 ton per acre of lime and then re-test in 3 months to see how much the PH has changed. Then you can apply more as needed. The PH won’t change overnight, it typically takes several months so if you are in an area where the PH is below 5.5-6 range it’s important to plan in advance and get the lime in early.
Fertilize Your Food Plot
When considering fertilizer, everything is going to depend on your desired seed types. Different types of seed require different types of fertilizer.
Typically your legumes (peas and beans) will require a fertilizer type that has half the amount of nitrogen as they do phosphorus and potash. Something like an 8-16-16 is ideal for seeds of this type.
If you are planting a brassica and have tested the soil previously sometimes a pure nitrogen type of fertilizer such as urea will be great. If you haven’t tested though you risk burning the foot plot with too much nitrogen and often unless you are spreading immediately previous to a hard rain much of that will evaporate before getting into the soil. If you haven’t tested a 19-19-19 type of fertilizer will be much safer and provide good benefit, plus there is little risk of it evaporating before it is absorbed into the soil. I haven’t had time to test this year so I’ll be using 19-19-19 in my brassica and clover plots.
If you are planting chicory or clover types of plots, you will want to apply a bit lower content of nitrogen, similar to your legumes. An 8-16-16 or 6-24-24 will work great.
Last thing to think about with fertilizer is when to apply. I prefer doing two separate applications. One at the time of discing and planting, and another application a few weeks after once you have a few inches of growth. In my experience you will get great growth for a few weeks but when you apply a second round of fertilizer you will see tremendous growth for a few weeks after.
Obviously if you have had soil tests completed, you will apply your fertilizer at the recommended rates. If you haven’t had the soil testing complete, I’ll usually apply 150-200lbs of fertilizer per acre at the time of discing and planting, and then another 100lbs per acre a few weeks after.
Food Plot Wrap Up
As mentioned earlier in the article, my hopes are that the average hunter can see that basic food plots don’t have to be tremendously expensive or time consuming. Sure, there will be some hard work and effort but nothing a couple of weekends can’t take care of. I’ve grown some amazing food plots up to 1.5 acres in size with nothing more than a hand pump sprayer, ATV, ATV disc, and a hand broadcast spreader. I’ve also seen and hunted some great brassica plots over the years in areas that had simply been sprayed and then seeded/fertilized with a hand crank spreader. Sure, it is very nice to have big equipment like tractors, seed drills, boom sprayers, etc…..but it’s not necessary and you can absolutely improve the quality of your hunting property with much simpler tools.
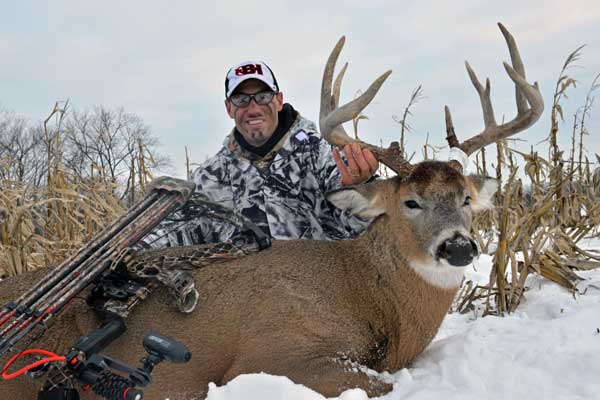
You can drastically improve your odds of harvesting a late season buck with the use of a good food plot. Todd Graf killed this Illinois buck as he fed on turnips in late December.

