Broadhead tuning is a technique that is often misunderstood and overlooked, but one that can be beneficial to anyone serious about their bowhunting.
With the popularity of mechanical broadheads, we’ve seen a decreased emphasis on good, old-fashioned bow tuning skills. Many bowunters falsely believe it is no longer essential that your bow and arrows be set up perfectly. You can always just screw in a few scissors-heads and you’re back in business – and back in the kill zone.
While there’s nothing wrong with being more accurate in the field (that’s the essence of ethical bowhunting) there are many bowhunters who won’t switch to mechanical heads for a variety of reasons. For them, the principles of broadhead tuning are far more than simply academic – they are critical to the outcome of the hunt.
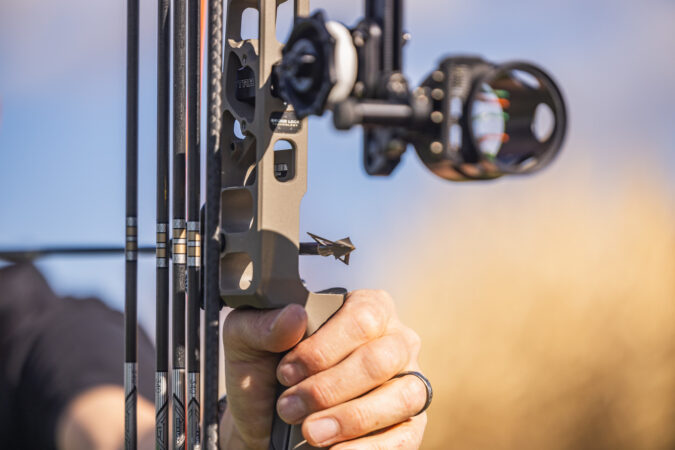
Broadhead Tuning Made Easy
STEP 1: Choose The Right Broadheads & Arrows
All else being equal, the broadhead with the smallest cutting diameter in flight will be the least effected by wind planing. Think of it this way. It is easier to make a paper airplane with small wings fly straight than one with large wings. Fixed-blade replaceable heads in the 1 1/8 to 1 ¼ inch range are a good choice for most bowhunting situations.
I’ve never tested a modern machined replaceable-blade broadhead that wasn’t straight. Any of these has the potential to shoot well from your bow. However, I have tested a few one-piece heads that were woefully crooked right from the manufacturer. In fact, the very first broadhead I tried to use with my first high performance bow was such a head. Not only did they not group with my field points they were so bad that the first one I shot actually hit the ground several feet short of the target! That was a wake-up call.
If you plan to shoot one-piece heads test each and every one before attempting to sight-in. You want only the straightest ones in your quiver. After you’ve gotten one arrow set up perfectly by following the guidelines in Step Three below (using a machined replaceable-blade head as a test unit), screw in each one-piece broadhead and repeat the test. Only those heads that turn true with the point holding solidly to a fixed reference point should be used.
If your broadhead-tipped arrows aren’t grouping together regardless of where you aim, you likely have some wobbly arrows or broadheads that need to be replaced, or reserved for field-point practice only.
The key here is that you must start with an arrow and broadhead combination that is spinning true, or your broadhead tuning efforts will be for naught.
STEP 2: Understand What Is Happening
Before we can fix the problem of poor broadhead flight, we need to understand what is happening and why. Assuming you followed Step 1 and your broadhead and arrow and spinning true, your poor broadhead flight is likely caused by an arrow that isn’t leaving the bow perfectly straight.
A telltale indicator of this is if your field points group well together and your broadheads also group well together, just not in the same spot. This typically indicates your arrows and broadheads are spinning true, they just aren’t leaving the bow the way they should be.
While we can get away with small imperfections using field points, those imperfections are magnified once you screw a broadhead on the end of your arrow. The blades of the broadhead act like additional fletchings to steer the arrow, and if it doesn’t leave the bow straight, there is little hope for the actual fletching to correct that once the arrow is in flight.
If the arrow leaves the bow tail-high, for example, the broadhead will catch the air causing the arrow to plane downward and impact low on the target. With a poorly tuned bow, you’ll get two groups, one with field points and one with broadheads. To bring the two groups together, your arrows have to leave the bow flying perfectly straight.
There are several causes for an arrow to not leave the bow perfectly straight. Most commonly they are nock height, either too high or too low, rest placement, either too high or low or left/right issues, and cam timing.

Step 3: Check Your Bow & Arrow Setup
At the first sign of erratic arrow flight I start with the basics, which means checking my nock height, rest height and centershot. I can’t tell you how much time I’ve wasted chasing tuning ghosts when the solution was as simple as making sure my arrow was level and centershot was set properly.
As a quick reminder, your arrow should be perfectly level or just slightly nock-high when your bow is at rest. Your arrow should pass squarely through the center of the berger hole (where your rest mounts), and centershot on most modern bows is 15/16″ off the inside of the riser.
Poor arrow flight almost always starts with something being off kilter.
Step 3.1: Paper Tune Your Bow
Once you’ve checked your arrow level and centershot, it’s never a bad idea to shoot an arrow through paper. I’ve found this to be a great way to find minor imperfections in the initial setup and be able to fine-tune things in the shop before you hit the range.
Paper tuning helps you confirm that your arrow is leaving the bow straight, and most of the time it will take care of your broadhead flight issues for you.
If you’re not familiar with paper tuning, the video below is a great resource to get started.
What if paper tuning doesn’t work or you don’t have access to a paper tuning setup? Fear not, we have other ways to skin this cat, remember.
When paper tuning isn’t an option my next go-to method is called walk-back tuning. This method is great for adjusting your centershot to clean up those left/right issues while you’re out in the field.
STEP 4: Tune Your Arrows
Now, hopefully you have a well-tuned bow that is shooting broadhead groups that have approximately the same center point as your field point groups. The next step is to tighten those broadhead groups. If your broadheads have a wider dispersion, the arrows themselves (and their components) are most likely to blame – not the bow or your shooting form. For a hunting arrow to be accurate, all its components must line up perfectly. Again, looking at the paper airplane, the tip and body must be perfectly in line or the plane will veer.
Nocks: It goes without saying that the nock needs to be installed so it’s precisely in-line with the shaft. Most modern indexing nock systems take care of this for you.
Shaft: The arrow shaft must be straight. Keep a dozen shafts aside to be used only for hunting, or take all your arrows to a pro shop to be straightened.
Inserts: If your inserts fit loosely when installed into the shaft, they will not all be perfectly square when the adhesive sets up. Your broadheads can end up pointing in any direction when you screw them in. Even small differences here result in huge differences 20 to 30 yards down-range.
Whenever the broadhead is pointing in a direction other than directly in line with the shaft, it will steer the arrow. This would be like bending the nose of a paper airplane one direction. As I’m sure you know from experience, it will turn and dive dramatically when you throw it. If your inserts aren’t lined up, one arrow might hit four inches high at 20 yards and another six inches low. Such random accuracy is completely unacceptable, and for many bowhunters a major source of headaches.
Step 5: Old School Broadhead Tuning
Bob Mizek, former Production Manager for New Archery Products, taught me a simple technique that really works. Its seems like magic, but it’s not. It is simply amazing how much difference tiny changes in rest position have on broadhead group location.
Basically, if your broadheads group separately from your field points, move your rest very slightly in the direction you want your hunting arrows to go.
If the broadheads are high or low, left or right of the practice arrows, move the rest very slightly downward or upward, to right or to the left, respectively. I repeat: very slightly. These tweaks are all that’s required to point your broadheads along the right initial path to hit the same place as your field points. Also, expect to move your sight pins very slightly after you finish with this step. But surprisingly, when you’re done your field points and broadheads will hit the same place.
My final note on broadhead tuning is to be careful not to skip Steps 1 through 4 and go straight to Step 5. I know it seems easier to save time and cut out some steps, but you’ll be doing yourself a disservice if you don’t tune your bow properly from the start.
Even if you are shooting a mechanical broadhead it is still important to tune and broadhead tune your bow! In fact, it may be even more important. If your arrow is not flying perfectly true and it impacts the target at an angle you’re sacrificing momentum and penetration, which are two major components for a clean, ethical kill.
